VNC server
last modified: 2023-11-15 by Kodai OkawaWhen we start the analysis, there are many situations where the analysis server on which artemis is installed is not only operated directly, but also remotely using “ssh”.
In such cases, there are various settings that need to be made in order for the figure to be displayed on the local computer, and some of these methods are described in this section.
We recommended to use VNC server currently, but note that policies may change in the future.
This is a list of ways to display the figures.
- X11Forwarding
- VNC server
- Save figure and check by using VScode
- Web browser (THttpServer)
X11Forwarding
This is the simplest method. Simply transfer the remote X to the local.
ssh -X analysisPCThis “X” option allow the X11Forwarding.
However, the problem with this method is that it takes a long time to process, and it takes longer from the time the command is typed until it is drawn. It is also not recommended as the process can become slow if a large number of people use it at the same time.
However, it is simpler than other methods and should be used when necessary, e.g. for debugging.
VNC server
This is old version of VNC server (TigerVNC). Latest version supports more secure method, so this method may no longer be avaliable in the future…
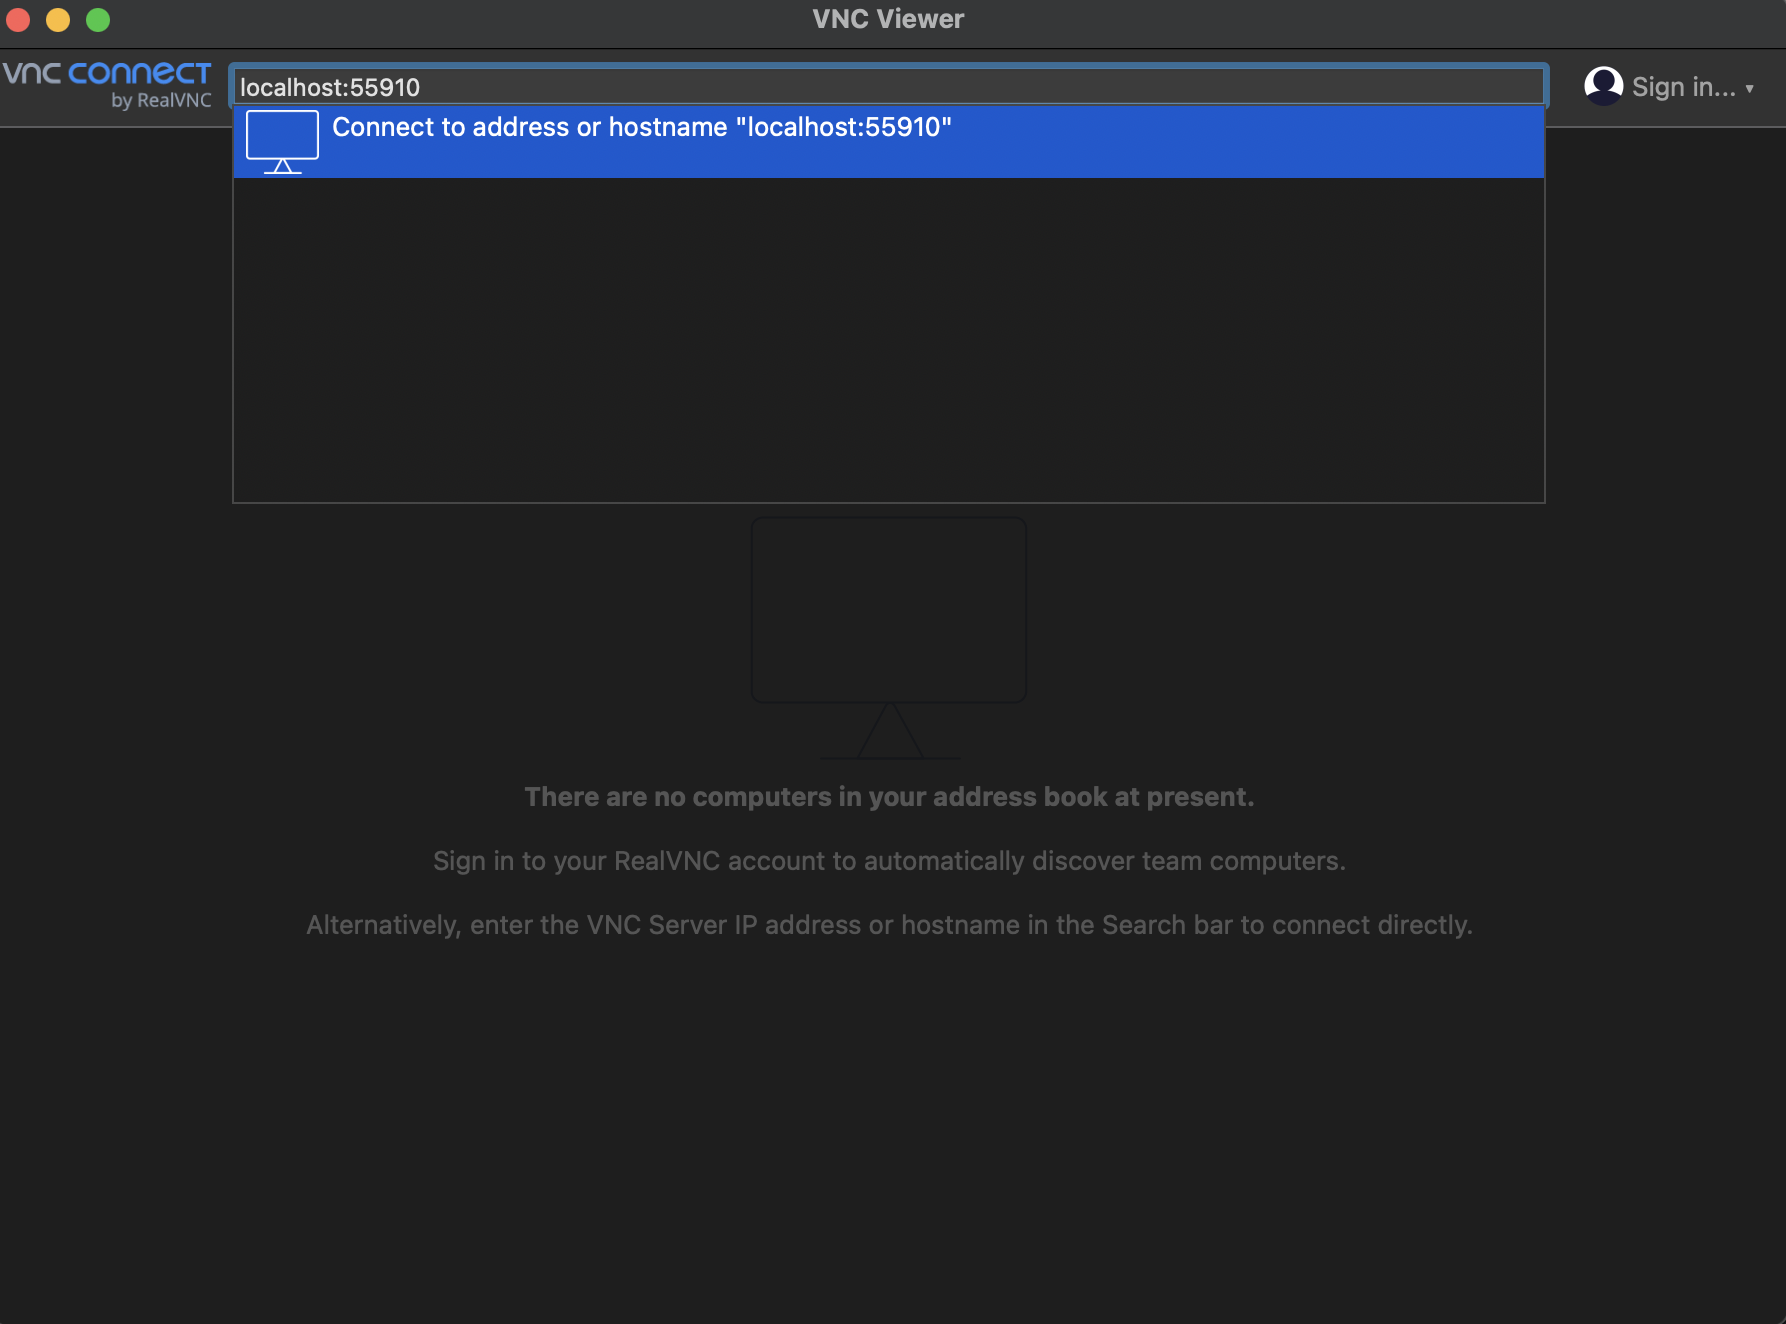
First please install VNC viewer to your PC. Any viewer may work well, but we are using this software.
First, please check the ID number of the VNC server we are running.
> vncserver -list

TigerVNC server sessions:

X DISPLAY #	PROCESS ID
:1		  3146
:5		  7561
:2022	  29499
:2		  23055
In this example, number 1, 5, 2022 and 2 VNC server is running. And select an available number to start the VNC server you want to use.
> vncserver :10 # start the VNC server!If you want to kill the VNC server, the below command will work.
> vncserver -kill :10 # kill the VNC server!Next, configure the canvas created by artemis to be sent to a VNC server.
The a command can treat this process by using .vncdisplay file!
> artlogin (username) # move to your artemis work directory
> echo "10" > .vncdisplay # write the ID of VNC server to the .vncdisplay file
Then, the setting in analysis PC is completed! The next step is to set up your local PC to receive this.
If you connect your PC in the same network with analysis PC, you can directory connect using the VNC viewer. However, CRIB analysis PC are connected CNS local network. In order to connect from outside network, we need to use “CNS login server”. If you want to make the login server account, please contact the CRIB member!
In this section, we are assuming that you have a CNS login server account.
To access the analysis PC, use two-stage ssh. Prepare the following configuration file.
Host login
    # need to change
    HostName CNS_loginserver_hostname
    User username
    IdentityFile ~/.ssh/id_rsa
    # no need to change (if you want)
    ForWardX11Timeout 24h
    ControlPersist 30m
    ForwardAgent yes
    ControlMaster auto
    ControlPath ~/.ssh/mux-%r@%h:%p

# any name is okay
Host analysis
    # need to change
    HostName analysisPC_hostname
    User username
    IdentityFile ~/.ssh/id_rsa
    # no need to change (if you want)
    ProxyCommand ssh login nc %h %p
    ForwardAgent yes
    ControlMaster auto
    ControlPath ~/.ssh/mux-%r@%h:%p
    ControlPersist 30m
Then you can access to the analysis PC simply by:
> ssh analysisNext, in order to receive from the VNC server, we use port-forwarding! VNC servers with ID x use port number 5900+x. For example if we use number “10”, the port will be 5910.
Forward this to a certain port on localhost. This number can be any number that is not in use.
---
title: An example of port-forwarding
---
graph LR;
    A(analysis PC<br></br>port 5910) --> |send|B(local PC<br></br>port 55910)
Host analysis
    HostName analysisPC_hostname
    User username
    IdentityFile ~/.ssh/id_rsa
    LocalForward 55910 localhost:5910
    ProxyCommand ssh login nc %h %p
    ForwardAgent yes
    ControlMaster auto
    ControlPath ~/.ssh/mux-%r@%h:%p
    ControlPersist 30m
This allows you to display a VNC display by accessing port 55910 on your own PC (localhost), instead of having to access port 5910 on the analysis PC!
If your PC is in the same network, changing “localhost” to the “IP address of analysis PC” is okay (ex. 192.168.1.10:5910).
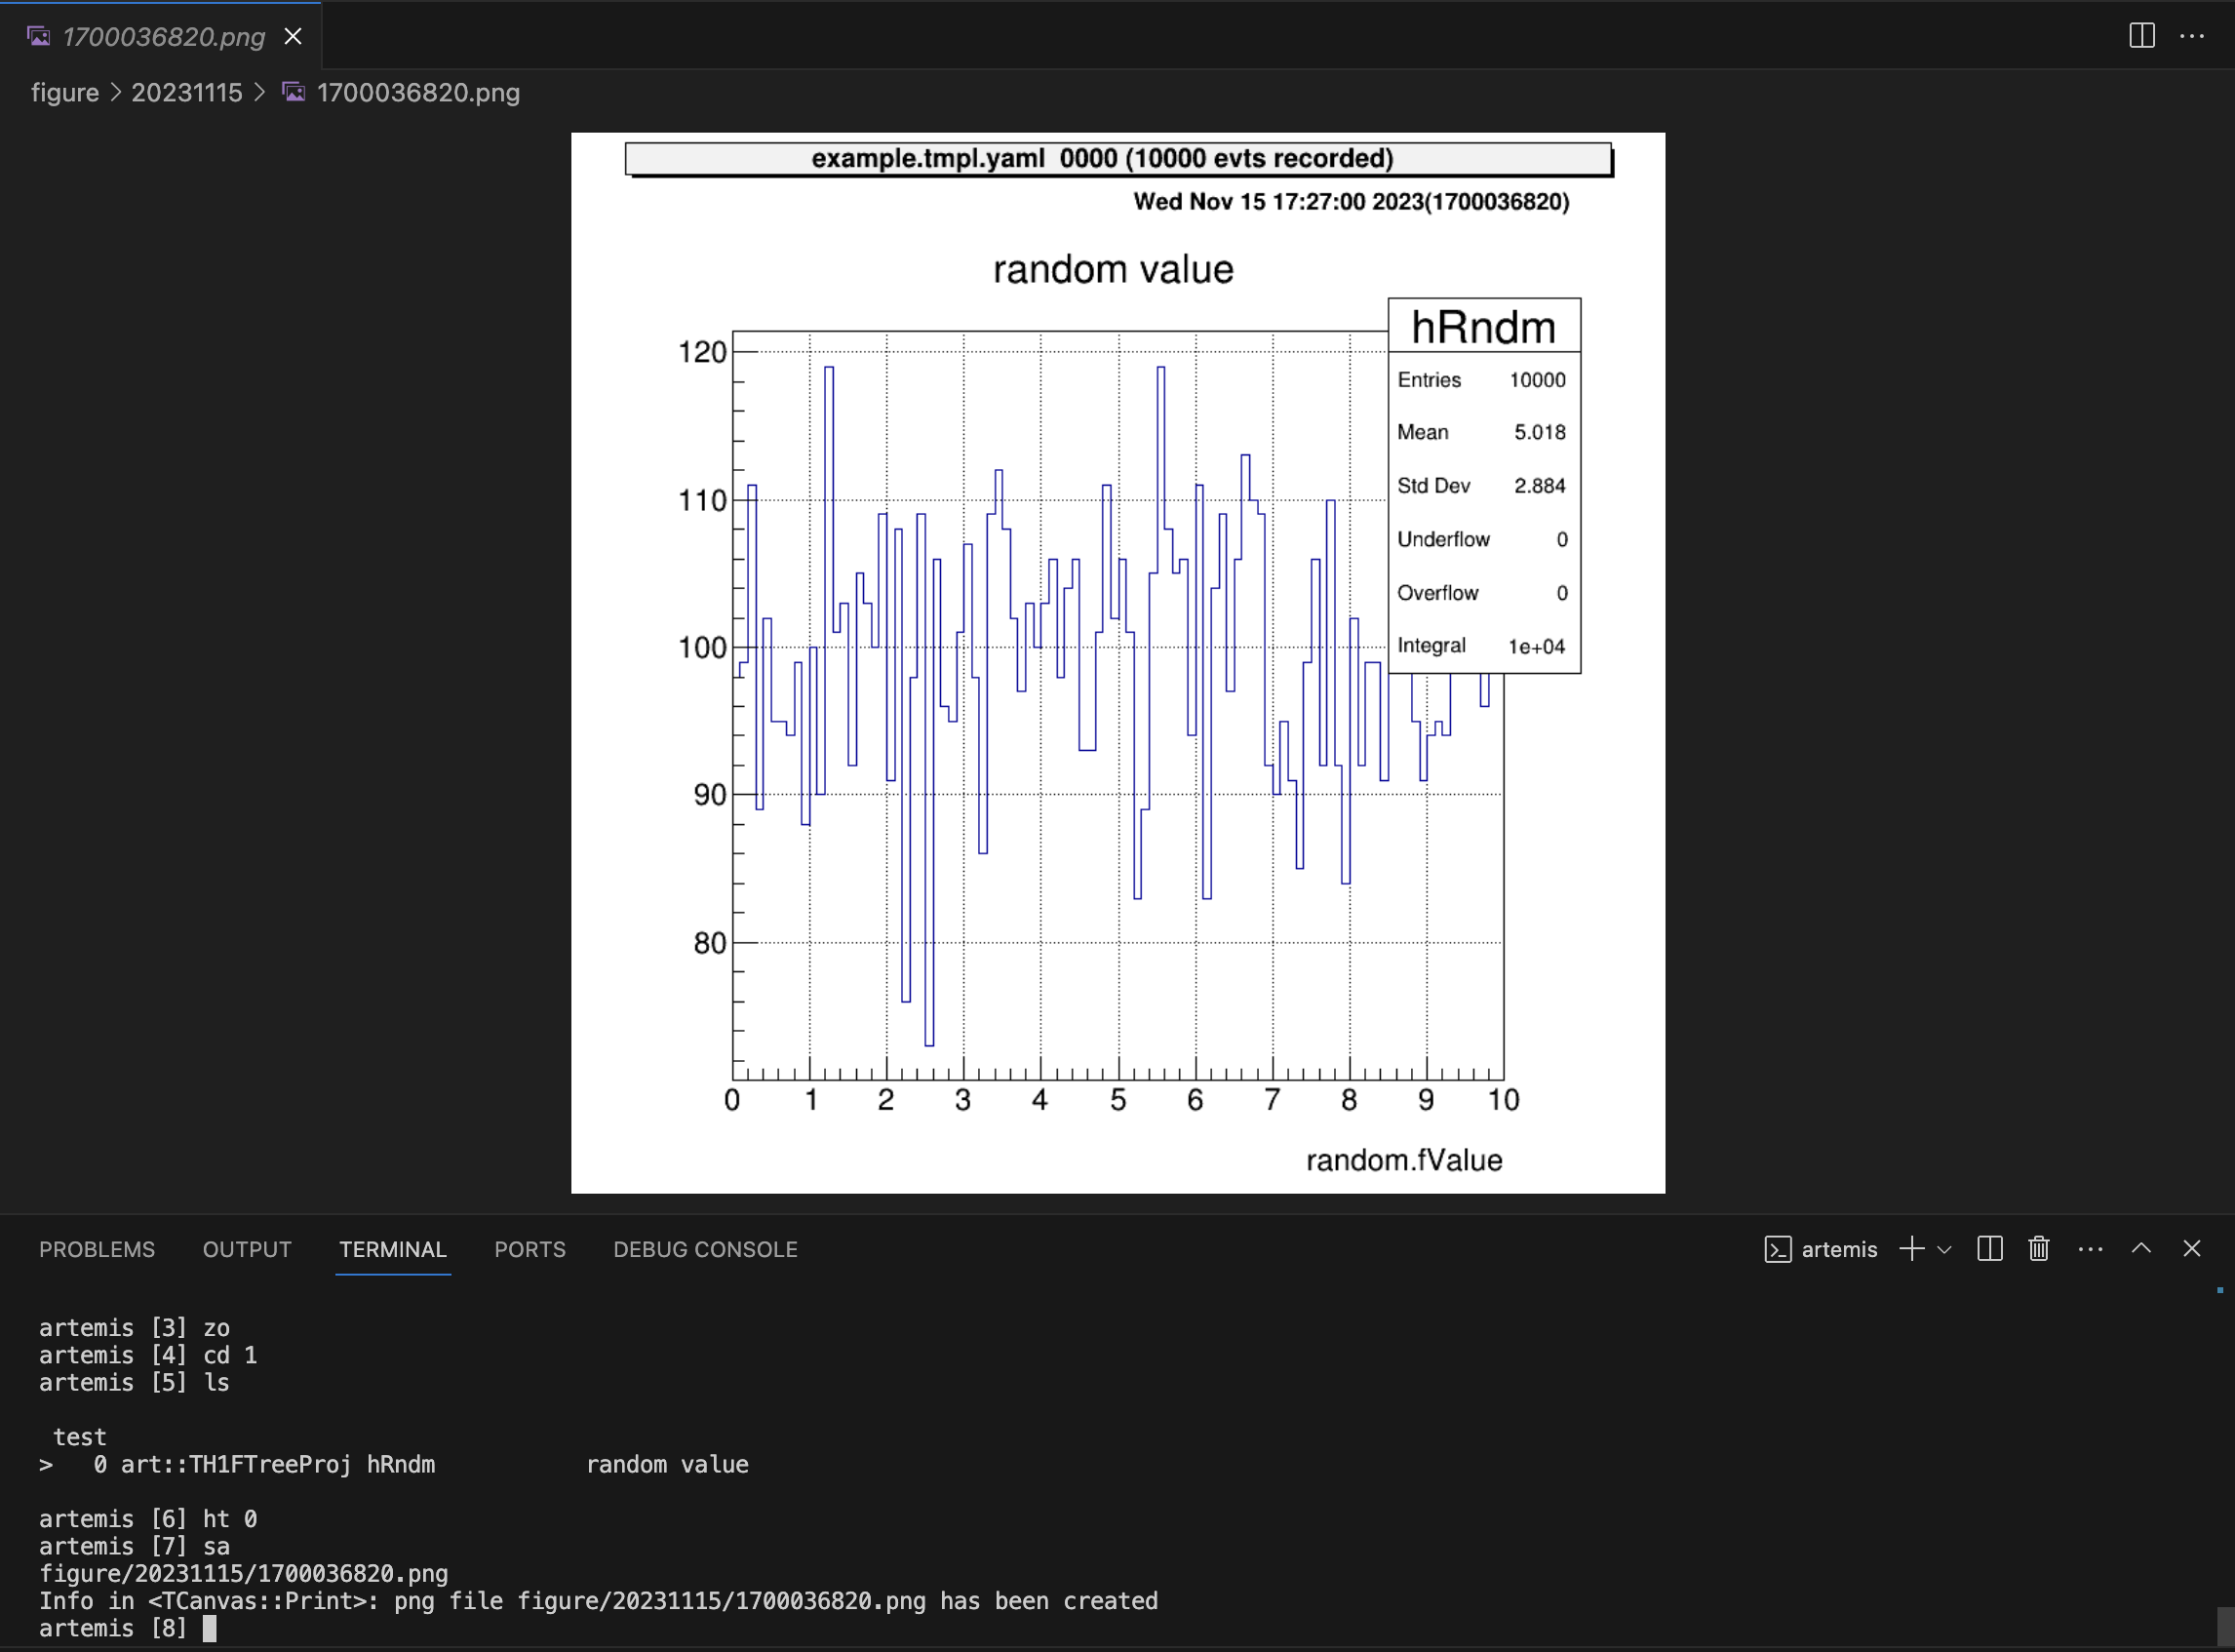
Save figure and check by using VScode
VScode is very exciting editor! The extension supports ssh and allows remote png files to be displayed on the editor.
However, it is a bit time-consuming as the diagram has to be saved each time to view it. Please refer to this as one method.
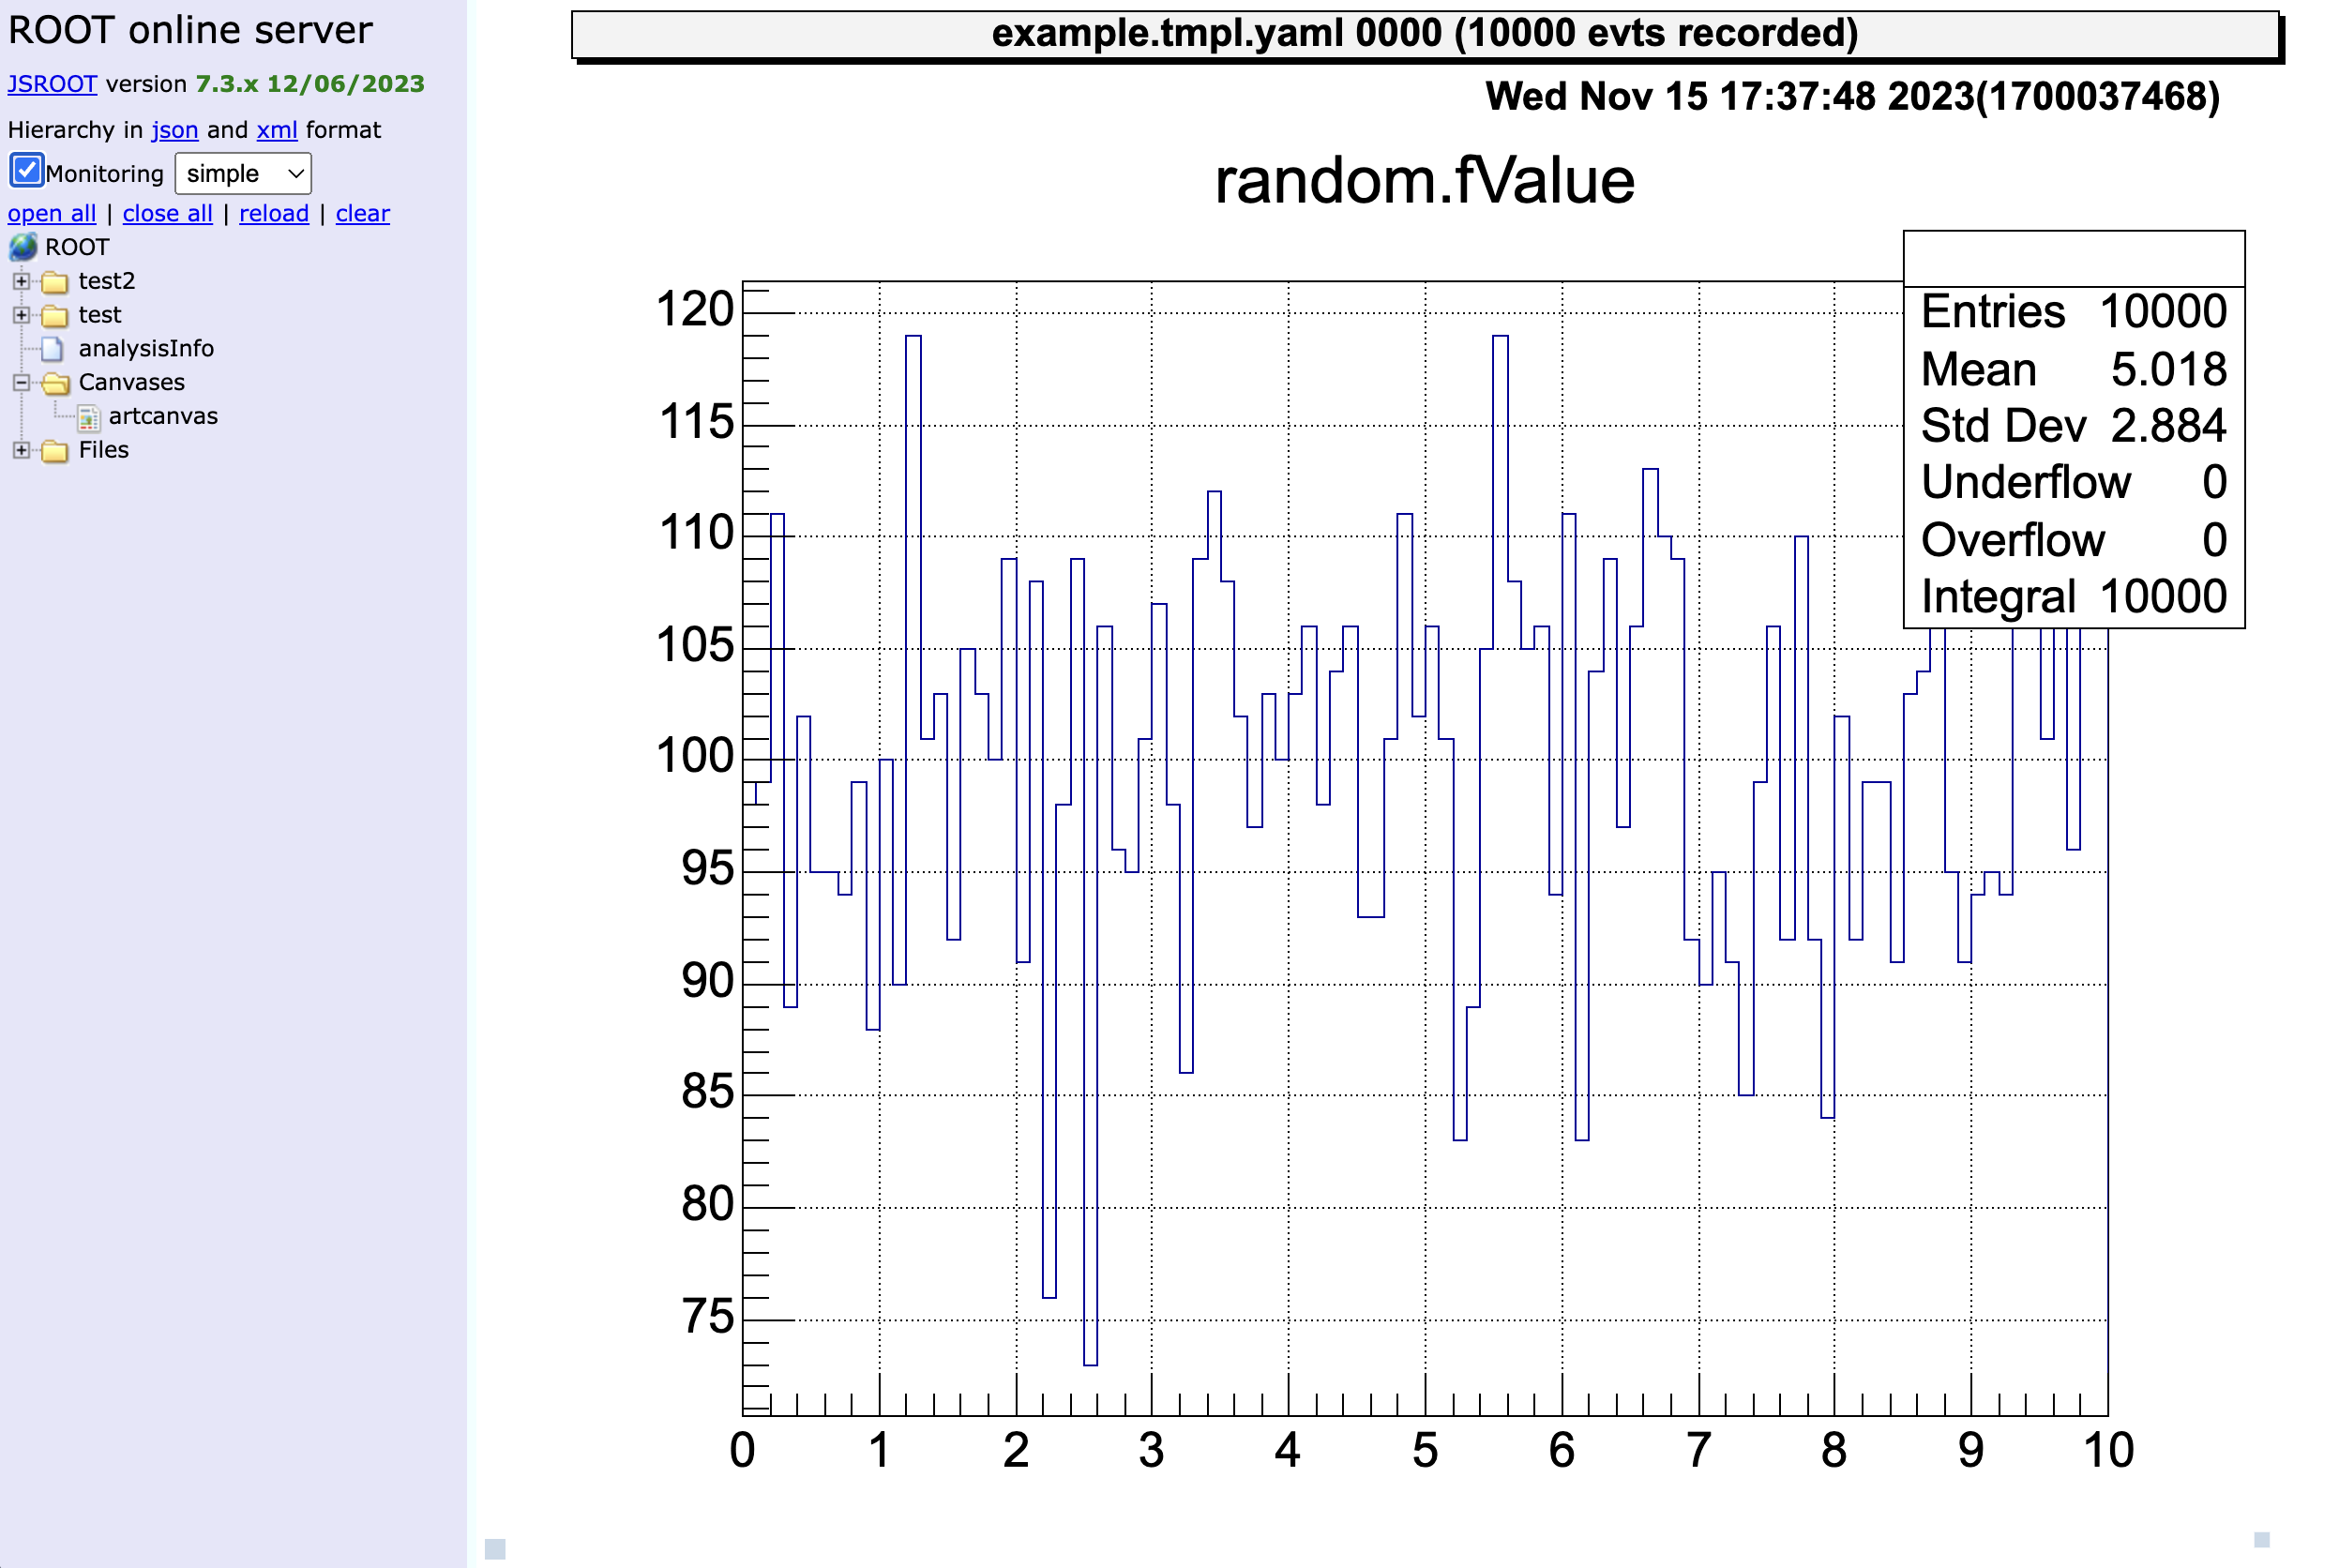
Web browser (THttpServer)
This is option…
Now the histogram object cannot display by JSROOT, because the object is not actually “TH1” or “TH2” object but “TH1FTreeProj” or “TH2FTreeProj”. (ref: issue#40)
We can only display the “TCanvas” Object.